🧁 Instructions
Step 1: Make the Cake
- Preheat oven to 175°C (350°F). Line a 9×13 inch (or 30x40cm) baking pan with parchment.
- Cream butter and sugar until light and fluffy. Add vanilla and eggs, one at a time.
- Mix in flour and baking powder until smooth. If too thick, add 1–2 tbsp milk.
- Spread 2/3 of the batter into the pan.
- Mix cocoa powder into the remaining 1/3 of the batter, then dollop and gently spread on top of the vanilla layer.
- Evenly scatter the drained cherries over the batter. They’ll sink a little and create those “waves” when baking.
- Bake for 35–40 minutes. Let cool completely.
Step 2: Vanilla Buttercream
- Cook pudding powder with milk and sugar according to package. Let it cool completely with plastic wrap touching the surface (to avoid a skin).
- Beat softened butter until creamy.
- Gradually beat the cooled pudding into the butter, a spoonful at a time, until smooth and fluffy.
⚠️ Butter and pudding must be the same temperature to prevent curdling!
- Spread buttercream evenly over the cooled cake base.
Step 3: Chocolate Glaze
- Melt chocolate with oil over a double boiler or microwave in short bursts.
- Let it cool slightly so it doesn’t melt the buttercream.
- Pour over the buttercream and spread quickly with a spatula.
- Optional: Use a fork to make the classic wavy pattern before it sets!
🧊 Chill & Slice
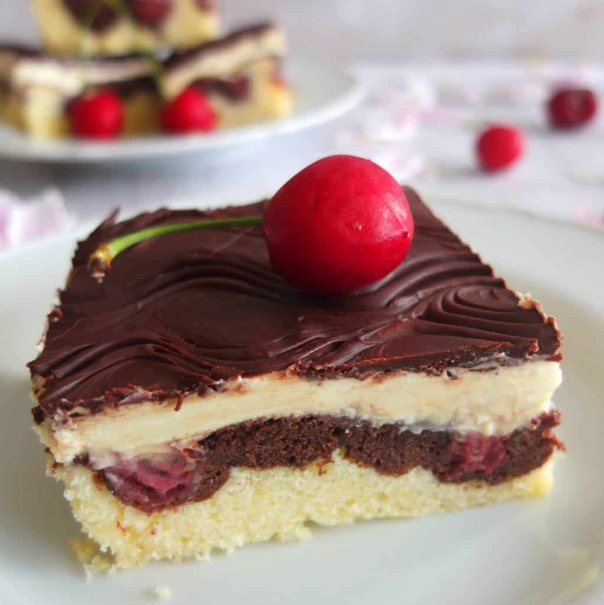
Refrigerate for at least 2 hours (or overnight) to set. Slice into squares or rectangles and admire those gorgeous layers: vanilla, cocoa, cherries, cream, and shiny chocolate top.
💡 Tips:
- Don’t skip the chilling—it helps the layers firm up and slice cleanly.
- If you’re short on time, use instant pudding for the cream layer.
- Want to get playful? Add a drop of almond extract to the cake or cherry layer.
Would you like a video voiceover idea, Hungarian nostalgia-style caption, or a beautiful printable card for this one, Ashley? It’s got vintage elegance written all over it! 🇭🇺✨